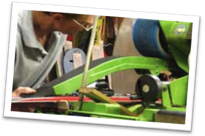
Ski Tunes: They Make a Difference

So what is involved in the “Tune” that makes such a difference in how your skis look, feel and perform?  Read on:

1.  Inspection:  The top, base and edges are wiped clean of any dirt, solvents, and excess wax.  Then the ski / board is inspected for any damage.

2.  Base Repair:  Any nicks, gouges, or core shots are repaired and filled with base repair material.  (This service is an extra charge- not everyone needs it.)

3.  Base Grinding:  The ski/board is then run across the stone grinder to remove any minor damage and make the base flat and true. In doing so, tiny cuts are ground off and the base becomes true and flat. The base becomes able to absorb wax and the structures created aid in gliding. This new structure also helps prevent suction and friction between base and snow. Your ski / board glides better and accomplishes the transition from edge to edge more easily. In addition, different temperatures and snow conditions require different structures – only the technician knows the right formula.

4.  Edge Grinding:  Most ski and board edges are “bevelled” between 0 and 2 degrees and a continuous smooth surface is created. The WINTERSTEIGER machine is able to reproduce this exact edge for ultimate carving performance on the hill.

5.  Waxing:  The last step in tuning is hot waxing. Hot wax impregnates the base, protects against damage and improves the gliding and turning properties of skis and boards.  Professional level waxing is a 4-step process in itself.  Shep’s offers a full line of Swix waxes from rub-on Universal F4 to Cera F (which World Cup racers know is not actually a wax, but 100% fluorinated carbons) as well as brushes, files, stones, vices, tables and everything you need for at-home touch-ups in between your professional services.

6.  Hot Box:  Shep’s Swix Hot Box is used by top level competitors and serious recreational skiers and riders to prepare equipment for top level performance. Warm air at a constant temperature allows wax to penetrate and saturate base material for the ultimate in base protection and glide capabilities.  Hot Box wax service can be added to any Tune purchase for an additional fee.  Visit our Repair page for current pricing.

Ski or board tuning should only be carried out by a WINTERSTEIGER trained technician who understands your requirements. Unprofessional tuning can have negative effects and spoil your fun in skiing or snowboarding. Although manual tuning is possible, WINTERSTEIGER  guarantees perfect bases and exact edges.

Regular ski / board tuning keeps your equipment in top shape and guarantees each run you take down the hill brings more enjoyment for you!

Black Friday Sneak Peek…..

Check it out, friends…. your first chance to scope out deals for Black Friday. We’ll be here at 8am to set you up with everything you need for winter!

Take a peek, enjoy Thanksgiving feasts, then stop in Friday for the best deals of the winter!

Flier prices valid starting 11/23/12. Not all sales are available on Shepssports.com.

Shep’s is HAUNTED?

If you’ve read Weird Wisconsin, taken a downtown ghost tour, or done any personal research, you might be onto the rumor that Shep’s is haunted. Some staff members have had “encounters” with the ghosts, some haven’t seen or felt anything at all. What we do know is that the “Shepherd & Schaller is haunted” message keeps us on our toes around here!

A paranormal group from Stevens Point came to the shop this summer, along with Wendy, a medium from Minneapolis. Take a look at Wendy’s recap of the night here. If you’re into ghost stories, you’ll probably like her writeup.

We’ll leave you with this photo, and you can make up your own mind.

Their camera caught what looks like a vortex in our stairway. Photo taken from http://www.stevenspointparanormal.com/.

How to shop a ski swap.

Anyone who’s been to a ski swap knows it can be overwhelming.  There’s gear everywhere, loads of people are crowded into a small space, and most likely your children aren’t on their best behavior.  Add to that the uncertainty of not knowing if the equipment you are buying is a good value or the right fit, and it can be a downright nightmare.  Since swap season is upon us, I thought I’d pass along a few tips to help ease the stress and ensure a positive shopping experience.

Skis – The #1 question I get while working a swap relates to sizing.  Luckily, it’s pretty simple: for children, we are fitting beginners anywhere from the base of the neck to the chin, meaning the ski tip should fall into this range when the tail end is placed on the ground next to a standing child. Any taller, and the skis will be too hard for them to control and learning to develop a feel for turns will be more difficult. Intermediate / advanced youth skiers are usually sized from the chin to the forehead. When shopping for adults, beginners should look for a ski length that falls somewhere around the chin. Intermediates are sized around the nose to eyebrows in length, and advanced skiers will want to stick around the forehead and up. Remember these recommendations are just that – recommendations. If you are an advanced skier looking for a quick turning, easy to ride ski, cheating down to a shorter size is totally fine. The only thing we urge parents not to do is get their children into gear that is too big in the hopes it will last a year or two longer. More times than not, the child will not enjoy their introduction to skiing due to the difficulty they face with skis that are too long or boots that are too big.

Another thing to remember to check when purchasing used skis are the bindings. You’ll want to ensure the they aren’t just too old. Each season, our shop receives a list of bindings we are legally allowed to work on. Once a binding reaches a certain age, it’s considered non-indemnified. What is non-indemnification? In short, it means the manufacturer no longer supports or recommends shop technicians working on those bindings because of age. Why do you care if a binding non-indemnified? Because if you buy skis with non-indemnified bindings, you probably won’t find a shop willing to adjust them for you (ours included). Most swaps will have a list floating around, so don’t hesitate to ask.

Snowboards – Boards are usually sized by weight, so it’s a good idea to check manufacture’s recommendations for yourself / children prior to visiting a swap. If that’s not something you have time to do, a very general rule of thumb is to fit a board between the chin and the nose with the tail end of the board on the sitting on the ground. Beginner youth sizing is a bit shorter, with the tip of the board usually somewhere in the neck area. Again, I stress this estimate is just a starting point. Ability, terrain, and boarding preference all play into which board is the best choice. And for those with size 11 feet or larger, it’s a good idea to look for “wide” board versions to give you a bit more width underfoot. This reduces the chance of hitting the tips of your boots in the snow during your toe-side turns.

At swaps, most boards include a binding in the total purchase price. Bindings are available in several sizes designed to fit a range of boot sizes, so it’s important to ensure the boots you’re buying fit into the bindings. To do this, simply open both straps and slide the boot into the binding. If the boot is too wide to slide all the way to the back of the binding or too small allowing side to side movement once in the binding, the fit is no good.

Boots – Like skis, sizing is the one thing people need the most help with. Fortunately, like sizing skis, fit is actually pretty easy to determine. With ski boots, there are two ways to do it. The first is the quicker of the two, but it’s not 100% accurate. And while we also wouldn’t recommended for fitting children’s boots, it works if you’re in a hurry. To do it, place your foot into the boot and close the top buckle only. Forcefully flex your shin forward towards the front of the boot several times. This helps set the heal back into the rear of the boot. Once this is done, you can fasten the remaining buckles. When you feel happy with the tension of all the buckles, stand with your feet shoulder width apart. With your knees locked backwards in an upright position, you should be able to feel a slight pressure on the tip of your big toe from the front of the boot. With knees bent forward towards the front of the boot (the position you would be in while skiing), the toe pressure should go away. If fitting a youth boot this way, it’s best if they don’t feel the toe at the front of the boot to ensure a little room for foot growth. Just be sure to check overall fit and make sure the boot can’t be pulled off the foot while buckled.

The second way to fit boots is called shell fitting. While a bit more time consuming, it’s the only way to ensure a proper boot fit, and is highly recommended for children. To do this, start by removing the liner from the boot shell as shown below.

Then, place the foot into the shell of the boot and slide the foot forward until the toe just touches the front of the shell. Next, measure the distance from the back of the heel to the back of the shell with your fingers. Adults should have one and one-half to two finger widths, children should be around three to allow for foot growth. For a more performance fit with adults, cheat down to about one finger width behind the heel. Remember that while a proper fitting boot will feel too snug at first, the volume of a new boot will increase during the first few times up to the hill. Also, a boot fit like a comfortable sneaker will increase the risk of blisters and discomfort while decreasing your ability to control your skis.

The overall fit for a snowboard fit is very similar to that of a ski boot – there should be a little pressure on the toe while standing with the knee locked backwards. Once the knee is bent forward, this pressure will go away. With all boots, it’s important to note that if you feel any pain or pressure while trying them on, try other models and brands. Most of the time, this discomfort will not go away after wearing the boots a few times and will make for a long, painful day on the slopes. Also if you feel any heel lift inside the boot while walking in them, keep looking for something better. This too could lead to discomfort, increased fatigue, and loss of performance.

Poles – Poles are easy. Just flip it upside down, grab the pole so the basket is resting on top of your hand, and place the handle on the ground. With your elbow at your side, your arm should be making a 90° angle. Simple as that.

Lastly, make sure to check the condition of the gear you are buying. Not sure what to look for? Check out my recent blog post. It will tell you all you need to know about damage, wear and tear, and caring for you new gear.

Swaps are a great place to find deals as long as you know what you are looking for. Be sure to research ahead of time and only buy equipment that fits both you and your ability level. A great deal on a pair of race skis will only end in disappointment if you are a beginner looking to hit the slopes for the first time this year!

Nordica’s Natural Foot Stance (NFS)

This week, our Nordica rep Nick stopped by the shop for a short informational clinic on all the new ski gear.  I have to say the skis and boots look fantastic, and I wanted to take a minute to pass along one really cool feature with Nordica’s ski boots.  Called Natural Foot Stance (NFS), the fit design places the user’s foot at a slight toe out stance, making it easier for users to initiate turns, experience better edge control, and have a more natural feel to the stance while in the boot.  This is one of those ideas that just makes sense, and will reward skiers of all ability levels with a better ski experience.  Very cool!

If you’re in the market for a new pair of ski boots, now is a wonderful time to stop in.  We have a great selection of boots in stock to fit skiers of all ability levels.